Showing posts with label Nicaraguan Cuisine. Show all posts

Saturday, May 4, 2013

Bean Soup


Bean Soup
 
Serves: 7 servings of 1 cup each
Time:  1 hour and 10 minutes
Source: Family Recipe
 
Ingredients:
1 and 2/3 cups dry beans of your choice [ I chose black beans]
water
2 tablespoons salt
 
Goes well with:
Tortillas
 
Can be used for:
Eating straight as a soup
Refried Beans
Bean and Garlic Dip
 
[Note: For a day where you can spend time in the kitchen because these beans need constant supervision]
 
Recipe:
 
1] Put beans into a pot with tall sides.
2] Add water until just covered. With your hands swish the beans around vigorously to wash them. Discard water. Repeat step 2 once more.
[The water will come out a tainted color]
 
3] Once the beans have been vigorously cleaned twice add enough water until there is the only the distance of your pinky to your first knuckle from the nail.
 
4] Cover the beans and put on to heat on medium high heat until you have achieved a rolling boil. About 6 minutes.
[ The beans will be floating don't worry it will go down]
 
5] Once the rolling boil is achieved half cover the pot of beans so the steam can be released and lower the heat to medium.
 
6] Keep on medium heat.
 
7] Stir occasionally scraping the bottom so that the beans don't stick to the bottom.
 
7] After about 45 minutes the water will have reduced considerably possibly exposing the beans. No matter how much the water has been reduced refill until the line of your pinky again. [It is not necessary to put your pinky on the hot pot the bean water should have left a residue showing where the line is.]
 
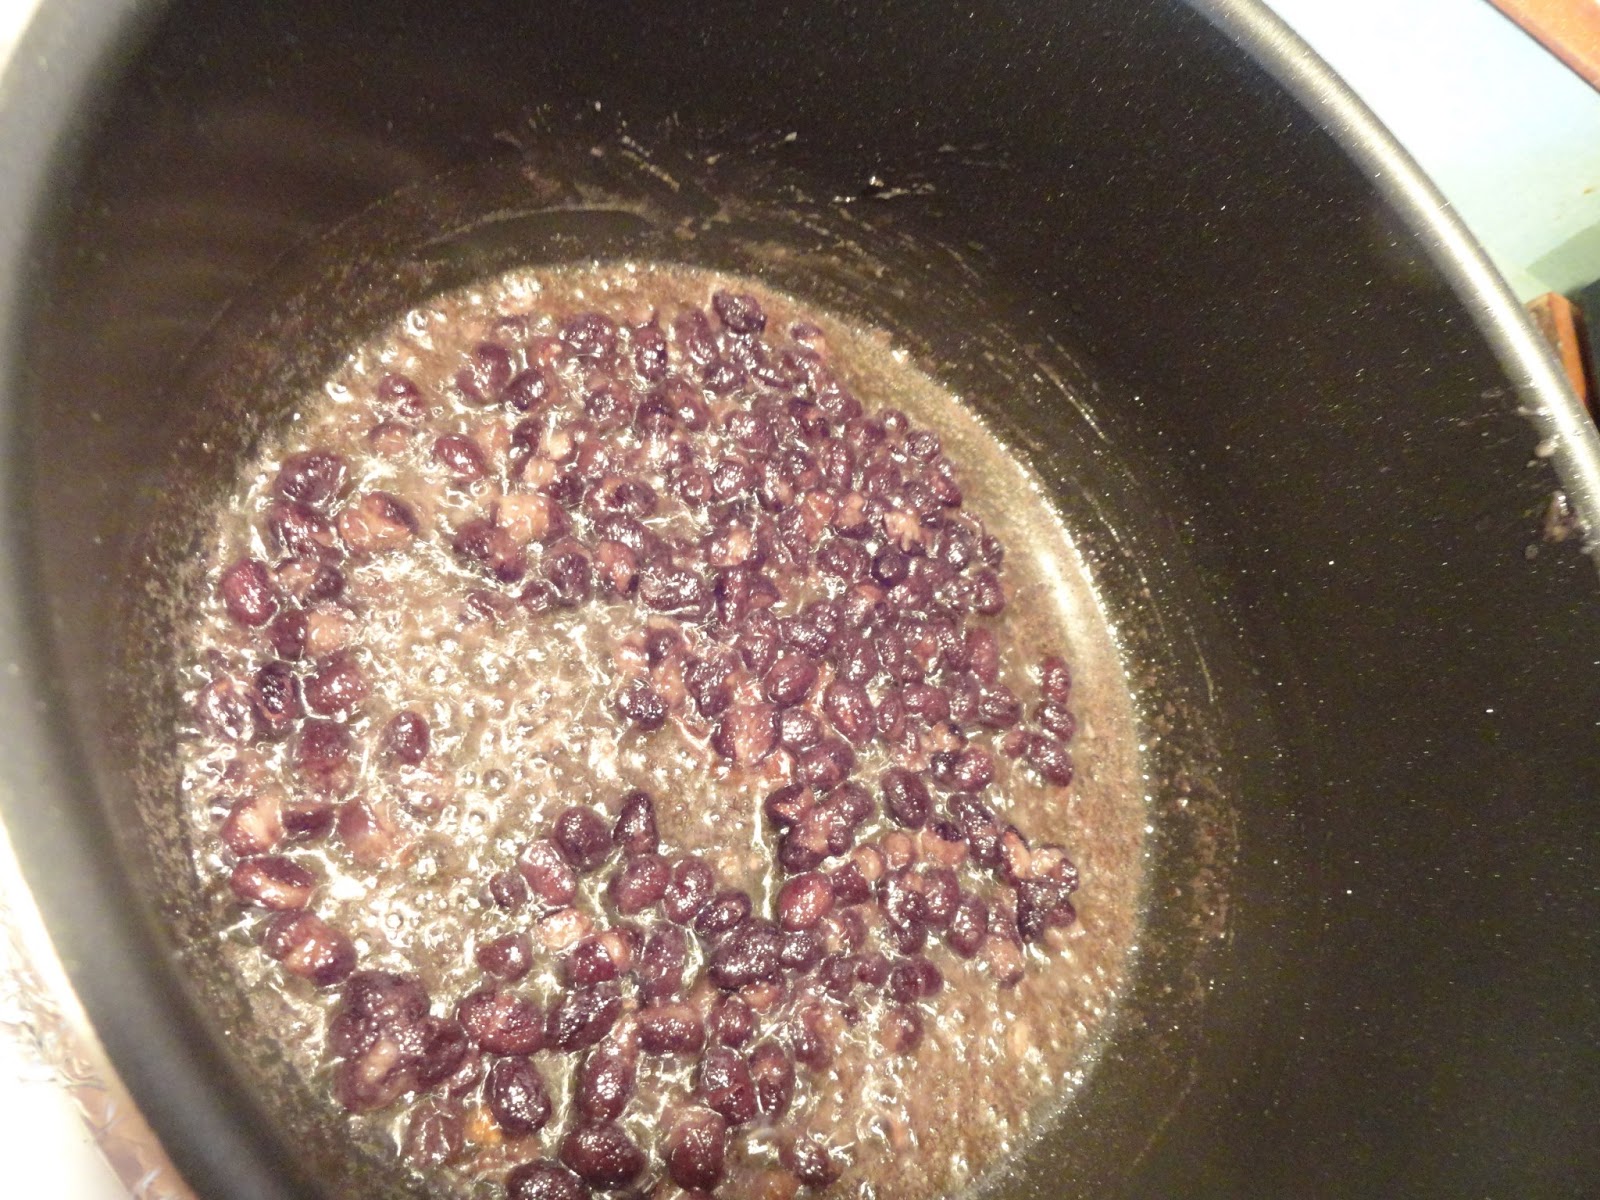
8] Add the 2 tablespoons salt and continue to cook on medium heat half covered for about 20 more minutes or until tender.
 Pictures of the Process
Washing the beans

 
+ Enough water until only the first knuckle of your pinky finger

+ Cooking
 
Bean Soup :)
 
Shelf Life: The beans soup can stay refrigerated up to 6 days. 


Top] Rio San Juan , Nicaragua
Bottom] The Costa Rican Rainforest, Costa Rica
 
 
Buen Provecho
- Piggy In Paradise
 

Cheesy Batter Tortillas


San Cristobal Volcano, Chinandega, Nicaragua

When you have nothing there is plenty to go around. That is how these delicious tortillas came to be. When someone I know was in a desperate situation people in an equally distressed situation kindly helped him by letting him have some flour. The result: He made tortillas. Originally a modest tortilla without cheese he later was able to make this more luxurious version with the cheesy batter. These tortillas are delicious and moist and thicker than the ones you might find at the grocery store. I seriously cannot make these fast enough!  As soon as one is ready i'll eat it before the next one is even off the pan :).

El Corinto, Nicaragua. Photo by Anthony John Coletti


Cheesy Batter Tortillas

Serves: 4 servings of 1 tortilla each
Time: 35 minutes from start to finish
Source: Family Recipe


Ingredients:
1 and 1/4 cups finely shredded queso de freir or queso blanco
2 cups flour plus ¼ cup separated
1 cup water plus ¼  cup separated
4 table spoons oil [I used peanut oil]


Delicious Accompaniments:
Guacamole
Bean Soup

 Equipment:
Non-stick frying pan
Large bowl
Wooden Spatula

 Pre-Recipe:
1] Shred the cheese.

Recipe:
1] In a large bowl combine the shredded cheese and flour with your hands. Add the water in ½ cup additions mixing the water into the dry ingredients with your hands as thoroughly as you can between each addition.
[Note: Your hands and nails will get messy through the process]

2] Once all the water has been added. Mix the dough into a ball with your hands to test the consistency.  The dough should not stick to your hands to much [This means it is too watery] Or fall apart to easily [This means it is to dry.] The dough should come together to form a round ball easily a little bit more moist than play-doh and a little bit more dry than pizza dough. If it is not the right consistency add 3 tablespoons at a time of flour or 2 tablespoons at a time of water to dry it out or moisten it more depending on what you need.

3] Once it is the right consistency split the round dough ball into four smaller dough balls.

4] Pre-Heat a non-stick frying pan on medium heat for 1 minute. Meanwhile pour oil into a bowl or shallow dish. Fold 1 sheet of kitchen paper towel into 4 and dip it into the oil.  Rub the oiled paper towel all over the heated cooking surface of the non-stick pan. 

5]Take 1 tortilla dough ball and flatten it in the palm of your hand. Then pull outward from the center little by little like the spokes of a wheel or bicycle until the tortilla is no thicker than the nail of your pinky finger.

6] Put the tortilla onto the heated and oiled frying pan. Let the tortilla cook on that side for 1 minute.

7] Flip the tortilla over onto the uncooked side let this side cook for 1 minute. Meanwhile with a spatula [preferably with a rounded bottom] press and flatten the side of the tortilla facing upwards that has just been cooked for 1 minute. Press and pull starting in the center a going outwards little by little all around the tortilla like the spokes of a wheel or bicycle.

8] Flip once again and cook for 1 minute.

9] Flip again and cook for another minute. The tortilla should have attained  golden brown speckles signify that the cheese has melted and the tortilla has been thoroughly heated through. 

[You may continue to cook and flip until your desired crispness  is achieved. Some people prefer the tortilla a little bit softer and some a little bit more cooked and browned. ]

10] Turn off the heat and remove frying pan from heat. Transfer onto a serving dish .

11]Let the frying pan cool down for 2 minutes.  This is to avoid the oil burning and having a burnt tortilla.

12] Once it has been 2 minutes transfer the frying pan back to the burner and repeat steps 4-11 until all of the tortillas have been cooked.
Pictures of the Process
Queso de freir cheese
Shredded


+ flour + water

+mixing


This is the right consistency


+ Oiled Non-stick pan


+ Flattening it more with the spatula while cooking
+ Golden brown flecks of yummy melted cheese

Cheesy Batter Tortilla :)

Shelf Life:
The dough for the tortilla can be refrigerated covered or uncovered for 24 hours. When ready to use to use the dough you should dust with more flour to get it back to the right consistency. Whenever you do dust with flour mix it into the ball thoroughly so there is no dry flour left on the outside of the dough ball.

The cooked tortillas can be stored wrapped in plastic wrap or aluminum foil and stored in an airtight container for up to 12 hours. To revive them heat them remove them from wraps and microwave them for 30 seconds or until desired heat is achieved.

Saturday, April 27, 2013

Gallo Pinto [Fried Rice & Beans]


Discovering this delicious dish was an unexpected surprise. I was oblivious to Gallo Pinto until a few years ago when I was taught how to cook it. The person teaching me comes from a region in Central America where Gallo Pinto is common place, in fact it is the national dish. Gallo Pinto literally means "Painted rooster." The rice acquires its distinctive "painted" color from the beans.

Rainforest Costa Rica
Since I love regional world dishes stumbling onto this new challenge motivated me to learn how to cook it. I was determined to get it right. It goes without saying that I have made many "Failure" Gallo Pinto attempts along the way. At one point I even forgot to fry it in the oil! Now I cook Gallo Pinto very often. The saltiness of the bean soup really pairs well being toasted with the rice.
Traditional Costa Rican painted ox cart. Used to transport coffee from the lush hills.


This dish has many variations depending on which Hispanic country you venture to. This dish is the Nicaraguan and Costa Rican version. I am thankful to have found this delicious dish and I'm sure you will be just as delighted when you try it.

Gallo Pinto


Serves: 2 Servings of 1 and 3/4 Cups
Time: 15- 20 Minutes [This time does not include the time of making one batch of Homemade Bean Soup, making your own homemade boiled beans is the best way to go for this recipe. That way you can add more broth from the beans and adjust the salt to a higher level which is what really enhances the gallo pinto.]
Source: Family Recipe

Ingredients:
3 and 1/2 Cups Cooked Rice
2/3 Cup Beans from Bean Soup [Not Canned] Drained from the liquid  
1/4 Cup Bean Soup Liquid
1/3 Cup oil [I used Canola Oil]
Salt

Delicious Additions:
The following are just additions you can use to garnish the dish or eat as a side with the gallo pinto.
Sliced Ripe Avocadoes
Thick Julienne Sliced Queso De Freir or Queso Blanco
Fresh Tortillas

Special Utensils:
Large Non-Stick Pot

Pre Recipe:
1] Have Bean Soup made.
2] Have rice cooked.

Recipe:

1] Pre-heat a large non-stick pot for 1 minute over medium heat.

2]Add oil and allow to heat for 1 minute.

3] Add beans and bean soup liquid to oil
     [You should hear the sizzle as the beans enter the oil. If not it is fine but it indicates the oil was not hot enough. Also be careful as oil may splash if overheated]

5] Turn up the heat to between medium and medium high.

4]Allow beans and bean soup liquid to fry in oil for 6-7 minutes. Stir occasionally with a slightly rounded spatula mashing the beans as you stir. Bean soup liquid will have thickened. Avoid letting the beans and bean soup burn.
   [A tell tale sign that they are done is that the beans have acquired a grainy looking exterior somewhat similar to a raisin. Mash the beans according to how you prefer them.This Gallo Pinto is  traditionally done with the beans slightly half mashed.]

5] Add rice to the fried bean mixture.

6] Stir vigorously with spatula until the thickened bean soup mixture has evenly coated all of the rice.
[Caution: As you add the rice and stir vigorously be wary of the hot steam.]

7] Once all of the rice is coated. Stir about every 20 seconds so that the rice is evenly toasted throughout.

8] A tell tale sign that the rice has been toasted enough is that individual rice grains will shake by themselves. Also as you stir you will notice the rice that touches the pan will crust together occasionally as you lift them up while you stir. This process happens in 6-8 minutes.
[The aroma is somewhat similar to that of popcorn from the toasted rice.]

9] Remove from heat and let cool to your desired temperature for serving. Sprinkle with salt to your liking.


Pictures of the Process


Oil


+ Beans + Bean liquid

+ rice


Gallo Pinto :)


Delicious Additions:
Sliced avocadoes
Tortillas

Thick Julienne Cut pieces of Queso de Freir  or Queso Blanco
1]The pieces of cheese can be served cold to room temperature or they can be served the traditional way which includes arranging the pieces of the Gallo Pinto serving plate before the Gallo Pinto is ready and microwaving them for about 1 minute in the microwave or until they have melted to your liking.

2]Queso de Freir or Queso Blanco are cheeses that you can find in the Latin section of the cheese aisle.

Shelf Life: The Gallo Pinto can be kept refrigerated in an airtight container for about 12 hours. To revive heat in the microwave for about 1 minute or to your desired liking.