Monday, March 23, 2015

Thick Moist Brownies


Thick. Moist. Brownies. I have tried my fair share of brownie recipes, but never encountered the recipe that had me addicted. When I recently slightly adapted a recipe from Eva Bakes for my Double Chocolate Chip Muffins they came out so moist and brownie like that I got to wondering...If I made these in brownie form, would they be "the one"? I gave it a try and I am so glad I did because not only is it really simple to mix up (less than 12 minutes) they came out utterly irresistible.


These pictures truly do not do them justice. They were super moist and thick (tall), but in a way that makes them look unique and even more tempting I might add. I am not going to call them "the one"..yet. But I will say that they are by far my favorite so far and it will take some adventuring and experimentation with many, many other brownie recipes to knock them out of their newly won number one spot.


 Thick Moist Brownies
Servings: 9 servings when baked in an 8 x 8 inch pan Time: 45 minutes Source: Slightly adapted from Eva Bakes Bakery Style Chocolate Chip Muffins

Ingredients
2 cups all purpose flour
3/4 cup unsweetened cocoa powder
2 tsp baking powder
1/2 tsp salt
1 1/4 cups granulated sugar
2 large eggs
1 cup sour cream
1 cup milk
1/4 cup butter melted and cooled slightly
1/4 cup vegetable oil
1 tsp vanilla extract
1/2 cup milk chocolate chocolate chips

Step 1
Pre-heat oven to 375 Fahrenheit. Grease an 8x8 inch casserole dish with butter.
Step 2
Mix all dry ingredients (flour, cocoa powder, baking powder, salt and sugar) together in one mixing bowl. Mix thoroughly to combine and flatten out any clumps.
Step 3
In a separate bowl mix wet ingredients (eggs, sour cream, milk, melted butter, oil and vanilla).
Step 4
Slowly add wet ingredients to dry ingredients and mix until smoothly combined. Add chocolate chips at the end and mix just enough to incorporate them evenly.
Step 5 
Add mix to casserole dish and bake for around 35 minutes. If using a tester a few moist crumbs should come out while testing to ensure that it is adequately moist.


Pictures Of The Process


Fried Green Tomatoes

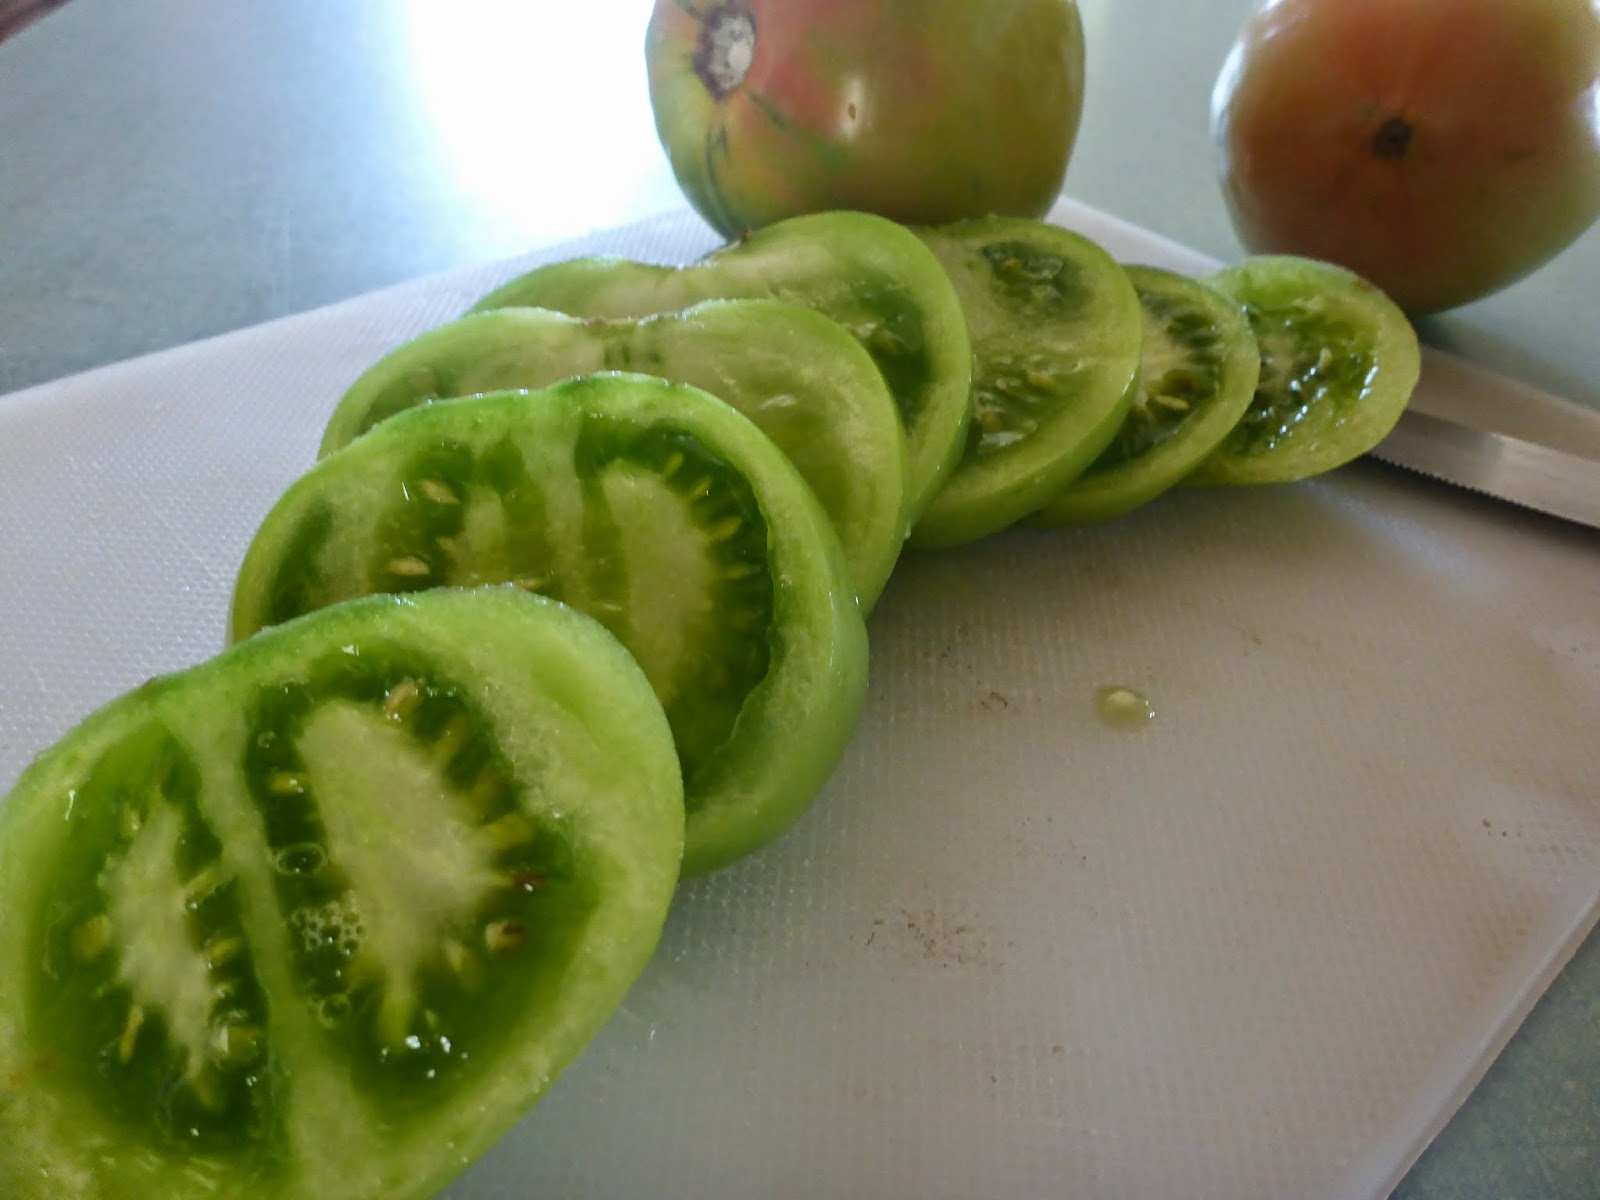
 I had heard of fried green tomatoes but hadn't ever had the chance to try them. Recently I was feeling sick and wanted to order food from a local restaurant. I usually always get the same menu item; a big juicy burger and fries. But I just wasn't feeling it that day. I was craving something lighter and this is when their lobster salad with fried green tomatoes came to the rescue. I had never tasted anything so unique and flavorful. The combo was just heavenly. These tomatoes have been on my mind ever since then and I knew I had to find a way to recreate them at home. This led me to make homemade mayonnaise and these delicious tomatoes. Next up: recreating the lobster salad recipe!


Fried Green Tomatoes
Servings: about 3 servings of 3 slices each Time: 45 minutes Source: Patrick and Gina Neely's Fried Green Tomatoes
Ingredients
2 green tomatoes
1 tbsp salt or to taste
2 dashes pepper or to taste
1 tbsp garlic powder
1 tbsp milk
2 eggs
1/2 cup all purpose flour
1 1/2 cups panko bread crumbs
pinch of cayenne
pinch of paprika

Step 1
Slice the tomatoes and prepare the stations to dredge the tomatoes. Bowl 1: salt and pepper. Bowl 2: garlic powder and flour mixed thoroughly. Bowl 3: eggs and milk mixed thoroughly. Bowl 4: Panko, cayenne and paprika mixed.
Step 2
Pre-heat oil. Start to dredge the tomatoes by rubbing them with a little bit of salt and pepper. Then rub with some flour. Dip in the egg mixture and finish off by coating with the panko. If you feel like your tomatoes are not adequately covered with panko repeat the process until you feel like the tomato has been adequately coated with breading. Continue with all tomato slices.
Step 3
Fry the slices about 2-3 at a time. Adjust your oil temperature as needed to evenly and safely fry.
Step 4
Serve with delicious dipping sauces or even homemade mayonnaise.

Pictures Of The Process


Saturday, March 21, 2015

Homemade Mayonnaise


My mom loves making everything from scratch. At a time she had started making mayonnaise for my dad's sandwiches from scratch. I was inspired and wanted to make homemade mayonnaise for some lobster salad and as a dip for some fried green tomatoes. I tried it without having high hopes because I know that sometimes it just doesn't set up and you are left with oily eggs....but with persistence and diligence the mayo came out great :). I was very pleased and it went very well with the other recipes I had planned.


Homemade Mayonnaise

Servings: About 1 cup mayonnaise Time: Under 10 minutes Source: Inspired by Epicurious Homemade Mayonnaise

Ingredients
1 whole egg at room temperature
1/2 cup vegetable oil


Step 1
Crack egg in a medium sized bowl. With an electric mixer mix briefly until very jumbled.
Step 2 
With mixer on high speed add the oil a couple of drops at a time. Once all oil has been incorporated keep mixing on high for about 8 minutes or until the mixture has thickened and lightened.

Note: Epicurious has this caution statement at the bottom of the recipe that I used as my guide: Raw egg is not recommended for infants, the elderly, pregnant women, and people with weakened immune systems. To avoid the risk of salmonella infection, you can use pasteurized egg instead.
Pictures Of The Process

Tuesday, March 17, 2015

Sweet Ginger Sauce For Chicken Soup

 Transform ordinary chicken soup into zesty livened up soup with this sauce. 

So what is it?

This sauce is comprised of some pretty potent ingredients like fish sauce, ginger and garlic. It might seem intimidating to some, but this sauce will really add a kick to chicken soup. The sauce has oriental undertones from the ginger and lemon/lime combo. All the flavors come together and pair up wonderfully with chicken soup. Bonus: the citrus, garlic and ginger only help this sauce transform chicken soup to be all the more healthier and vitamin packed for anyone suffering from a cold and in need of a heart warming bowl of soup.

This recipe was taught to my mom by my paternal grandmother and her sister who are from Vietnam. My mom's chicken soup is already really good, but when you add in this sauce it becomes virtually irresistible! Break down barriers and try adding this sauce to your chicken soup the next time you need a bowl of comfort.


Sweet Ginger Sauce For Chicken Soup
Servings: Makes about 3/4 cup of sauce which can serve 4-6 Time: 10 minutes Source: Family recipe
Ingredients
1/2 cup fish sauce
 1/2 tbsp peeled grated fresh ginger
1 clove garlic grated
1 1/2 tbsps fresh lemon or lime juice
2 tbsps sugar
1 dash of salt or to taste

Step 1
Grate ginger and garlic. Obtain juice from lemon or lime.
Step 2 
Add all ingredients together and stir.
Step 3
Taste and adjust as necessary.

How to serve? Prepare chicken soup as you normally would. Prepare a bowl of starch such as rice, abc noodles or orzo pasta in my case. Drench with chicken soup. Add ginger sauce to your bowl one spoon full at a time according to your preferences and stir in.

Note: This is a recipe that can be adjusted to your liking. Some people may prefer the sauce to be sweeter and others may prefer to add a little more citrus. You can freely add or downtown the ingredients to your preferences.

Buen provecho!

Monday, March 16, 2015

Double Chocolate Chip Muffins

 My daughter and I had so much fun making the chocolate chunk muffins that I couldn't help but find another muffin recipe to try out. We whipped up this batch in minutes. It was really simple and I am finding that muffins are making the perfect go to breakfast and snack for us. These were perfectly moist and soo chocolatey dense. Kind of like a brownie in muffin form!

Double Chocolate Chip Muffins
Servings: 32 mini muffins, recipe is easily halved for 16 mini muffins Time: 30 minutes Source: Slightly adapted from Eva Bakes Bakery Style Chocolate Chip Muffins

Ingredients
2 cups all purpose flour
3/4 cup unsweetened cocoa powder
2 tsp baking powder
1/2 tsp salt
1 1/4 cups granulated sugar
2 large eggs
1 cup sour cream
1 cup milk
1/4 cup butter melted and cooled slightly
1/4 cup vegetable oil
1 tsp vanilla extract
1/2 cup milk chocolate chips

Step 1
Pre-heat oven to 375 Fahrenheit. Grease muffin molds.
Step 2
Mix all dry ingredients (flour, cocoa powder, baking powder, salt and sugar) together in one mixing bowl. Mix thoroughly to combine and flatten out any clumps.
Step 3
In a separate bowl mix wet ingredients ( eggs, sour cream, milk, melted butter, oil and vanilla).
Step 4
Slowly add wet ingredients to dry ingredients and mix until smoothly combined. Add chocolate chips at the end and mix just enough to incorporate them evenly.
Step 5 
Add mix to molds and bake for 11-15 minutes. If using a tester a few crumbs should come out while testing to ensure that it is adequately moist.

Buen provecho!

Tuesday, March 10, 2015

Chocolate Chunk Muffins

My three year old loves Mickey Mouse Clubhouse. In one of the episodes Clarabelle makes moo-muffins for her moo-mart. Ever since them my daughter brings them up. I couldn't help but make these and call them "moo-muffins". My daughter loved them & I was very happy with how they turned out as well.  They have just the right consistency and are perfect for children or to pack for lunch.


Chocolate Chunk Muffins
Servings: 24 mini muffins, 12 regular or 9 large muffins Time: 45 minutes Source: Slightly adapted from Bakerella's Chocolate Chunk Muffins
Ingredients
1 1/2 cups all purpose flour
1/2 cup sugar
1 1/2 teaspoons baking powder
1/2 tsp salt or to taste
3/4 cup sour cream
1/4 cup milk
2 eggs
2 tsp vanilla 
1/4 cup melted butter, cooled slightly
1/2 cup milk chocolate chunks or chocolate chips

Step 1
Pre-heat oven to 375 degrees Fahrenheit. Grease muffin molds. Start melting butter.
Step 2
Combine and whisk flour, sugar, baking powder and salt.
Step 3 
In a separate bowl combine and whisk together the sour cream, milk, eggs, vanilla and melted butter.
Step 4
Add wet ingredients to dry ingredients and whisk until thoroughly combined. Add in chocolate chips.
Step 5
Add batter to muffin molds. Bake for about 18-20 minutes or until done depending on the size of muffins you are making.
Buen Provecho!

Monday, March 9, 2015

Thin Spiced Eggnog

A couple years ago my sister & my mom started a tradition of making homemade eggnog for the Christmas season. This version is very rich and spiced, but thin. If you like very thick eggnog this may not be the recipe for you. Past that, this eggnog is perfect for getting into the Christmas spirit and it is a drink that will always remind me of my family.


Thin Spiced Eggnog
Servings: 12 Time: Prep: 20 minutes Cook: 10 minutes Total Time Including Refrigeration: 6 hours and 30 minutes Source: All Recipe's Amazingly Good Eggnog by user Nataliesmom

Ingredients
4 cups milk
5 whole cloves
2 1/2 tsp vanilla extract, separated
1 tsp ground cinnamon
12 egg yolks
1 1/2 cups sugar
4 cups light cream
1/2 tsp ground nutmeg (plus more for garnish if desired)
optional rum to taste

Step 1
Combine milk, cloves, 1/2 tsp vanilla and cinnamon in a saucepan. Heat over lowest setting for 5 minutes. Slowly bring this mixture to a boil.
Step 2
In a large bowl combine egg yolks and sugar. Whisk together until fluffy. Whisk hot milk mixture slowly into the eggs. Pour whole mixture back into saucepan. Cook over medium heat stirring constantly for 3 minutes or until it is thick. Do not allow mixture to boil. Make sure that eggs do not scramble. 
Step 3
Strain to remove the cloves. Let cool for 1 hour.
Step 4 
Stir in rum if using, 2 tsp vanilla extract and nutmeg. Refrigerate overnight before serving.


Buen provecho!

Eggnog Bars

Anyone who loves eggnog will really fall for these bars. The eggnog flavor is key & this means that you should opt for a good quality eggnog that doesn't use artificial flavors because it will really effect the taste quality of the bars. I would even recommend making your own homemade eggnog to use in this recipe. 


Eggnog Bars
Servings: 8x8 inch pan yielding 9 servings Time: Prep time: 15 minutes Cook time: 25-29 minutes Cooling time: 40 minutes Source: Averie Cook's Eggnog Bars
Ingredients

Bars
3/4 cup white chocolate chips
1 stick (1/2 cup) butter melted
1 large egg, room temperature
2/3 cup granulated sugar
1/2 cup eggnog
2 tsp vanilla extract
1 3/4 cups all purpose flour
1 tsp cinnamon
1 tsp ground nutmeg
1/4 tsp salt or to taste

Glaze
2 cups confectioners sugar
1/3 cup eggnog or more for consistency
1/2 tsp vanilla extract
ground nutmeg to sprinkle on top

Bars:
Step 1
Pre-heat oven to 350. Line baking pan with aluminum foil. Grease foil & set aside.
Step 2
Melt the white chocolate and the butter being careful to not overheat.
Step 3
Wait a moment until the chocolate-butter mixture has cooled slightly. Add the eggs to this mixture being careful to not scramble them. Whisk to combine.
Step 4
Add the sugar, eggnog and vanilla. Whisk to combine.
Step 5
Add the flour, cinnamon, nutmeg and salt. Stir until just combined.
Step 6
Pour batter into pan and bake for 25-29 minutes, or until cooked through. To get the ideal consistency you can insert a tester. If a few moist crumbs come off then it is just right.
Step 7
Once cake is baked set aside to cool.

Glaze:
Step 1
In a medium bowl whisk all glaze ingredients together besides the nutmeg. Add more eggnog if a thinner consistency is desired. Glaze should be pourable.
Step 2 
Pour glaze on top of cake once it is completely cooled. Sprinkle some ground nutmeg on top. Serve at room temperature.